Learn how to use Prisma with a Next.js application to persist data to a database. I'll also show you how to setup a cloud database using railway and deploy your app to vercel.
If you're not sure what prisma is, check out the following article first:
Install Prisma
These isntructions will work on an existing Next.js app. If you're starting from scratch, you can use the following command to create a new Next.js app:
npx create-next-app
yarn add -D prisma
npx prisma init
This will create a new prisma folder in your project with a schema.prisma file inside of it. This is where you define your database schema.
.env and .env.local
Note
My motivation for for this section comes from how prisma and next.js handle environment variables. https://www.prisma.io/docs/guides/database/troubleshooting-orm/help-articles/nextjs-prisma-client-dev-practices https://nextjs.org/docs/basic-features/environment-variables
Prisma also creates a .env file where you can put your database connection string, but this conflicts with how Next.js supports env vars.
- Prisma will only look inside of
.envfor the connection string which is private information that should never be comitted and shared. - Next.js will look inside of a few files to load environment variables. However, next.js suggests only using
.env.localfor private information and comitting and pushing any other.envfiles.
To be safe, you should only add your sesitive env vars to .env.local in a next app. So we need to tell prisma to look inside of .env.local instead of .env.
yarn add dotenv-cli --dev
package.json file:// package.json
```json
"scripts": {
...,
"migrate:dev": "npx dotenv -e .env.local -- prisma migrate dev",
"db:push": "npx dotenv -e .env.local -- prisma db push",
"migrate:reset": "npx dotenv -e .env.local -- prisma migrate reset",
"db:seed": "npx dotenv -e .env.local -- prisma db seed",
"prisma:generate": "npx dotenv -e .env.local -- prisma generate",
"prisma:studio": "npx dotenv -e .env.local -- prisma studio",
"production:build": "npx prisma generate && npx prisma migrate deploy && next build"
}
Now anytime you need to run a prisma command, you can use the scripts you just added to your package.json file.
prisma migrate devyarn migrate:devprisma db pushyarn db:pushprisma migrate resetyarn migrate:resetprisma db seedyarn db:seedprisma generateyarn prisma:generateprisma studioyarn prisma:studio
Note
When it comes time to building your app for deployment, you should run yarn production:build instead of next build. This will run prisma generate and prisma migrate deploy before building your app.
If you're deploying to vercel, then just change the build script to be yarn production:build in your vercel settings.
DATABASE_URL
The next thing you need to do is supply a valid DATABASE_URL to your .env.local file so that prisma can start performing its magic.
SCHEME://USER:PASSWORD@HOST:PORT/DATABASE?schema=SCHEMA
Prisma's documentation has a few different examples on how you can do this, but before you can do anything, you need to know two things:
- Which database are you using?
PostgreSQL,MySQL,Microsoft SQL Server,CockroachDB, orMongoDB? - Are you going to use a local database or a cloud database?
Right now you're just in development so a local database is a good idea, but a cloud database is also a fine way to go.
Local Database
Let's say you're using a local MySQL database with the following details:
username=root
password=password
database=my_database
Then your DATABASE_URL would look like this
mysql://root:password@127.0.0.1:3306/my_database
Make sure that you update your db provider in the schema.prisma file to match your database provider.
datasource db {
  provider = "mysql"
  url      = env("DATABASE_URL")
}
Cloud Database
If you want to use a cloud database, then you can use the url from the provider you're using. If you're not sure which provider to use, I suggest using railway.app for MySQL or Postgres because it's free and easy to use. And I suggest using MongoDB Atlas for MongoDB because it's also free and easy to use and supports replica sets.
- Go to https://railway.app/new
- Select the database you want to use
- Click select
Connectand copy the url - Done
I suggest using PostgreSQL because it's the cheapest option for some reason.
schema.prisma
Now that you have a database, you need to define your database schema. This is where you define your tables, columns, and relationships. Don't worry, it's really easy to change this in the future, so just start with something simple so you can start playing around with prisma.
Here's a really basic Post model that has a title and some content:
model Post {
  id        Int      @id @default(autoincrement())
  createdAt DateTime @default(now())
  updatedAt DateTime @updatedAt
  title     String
  content   String?  @db.Text
}
/prisma/schema.prisma file, then run the following
command to migrate the database:Note
You never need to run this command if you're using MongoDB. MongoDB doesn't require you to setup a schema. So you can ignore anything to do with migrations if you're using MongoDB.
yarn migrate:dev --name init
This create a migration file, which is the raw SQL that needs to be run against the database. Then prisma runs that file against the database which in this case will create the tables. Everytime you update your models in your schema.prisma file, you will need to run this command.
You should now have a /prisma/migrations directory that contains all the raw SQL. You can completely ignore this directory, but make sure you commit it to your repo.
npm install @prisma/client
Time to start persisting data. Let's make an API route that allows someone to make a POST request to create a new Post in the database.
yarn add @prisma/client
/pages/api/posts.js and add the following code:// pages/api/posts.js
import { PrismaClient } from '@prisma/client'
const prisma = new PrismaClient()
export default async function handle(req, res) {
const { method } = req
switch (method) {
case 'POST':
// get the title and content from the request body
const { title, content } = req.body
// use prisma to create a new post using that data
const post = await prisma.post.create({
data: {
title,
content
}
})
// send the post object back to the client
res.status(201).json(post)
break
default:
res.status(405).end(`Method ${method} Not Allowed`)
}
}
yarn dev
You can use something like Postman, Insomnia, or ThunderClient to make the request. Here's an example using curl:
curl --request POST \
--header "Content-Type: application/json" \
--data '{"title": "some post title", "content": "some post content"}' \
localhost:3000/api/posts
If everything worked, you should see a response like this:
{
  "id": 1,
  "createdAt": "2021-03-01T00:00:00.000Z",
  "updatedAt": "2021-03-01T00:00:00.000Z",
  "title": "some post title",
  "content": "some post content"
}
Prisma Studio
Prisma studio is a GUI for your database. It's really useful for seeing what's going on in your database and for debugging. Even though there's not much data in the database yet, let's open Prisma Studio to see what it looks like:
yarn prisma:studio
You should see the Post model and the single post you just created:
You can use prisma studio to create, read, update, and delete data.
Single Client
Before we do write any more code to interact with data, we should refactor slightly. Our application should only have one instance of the prisma client, so this code should only run once:
import { PrismaClient } from "@prisma/client"

const prisma = new PrismaClient()
Instead of creating a new instance every time we need to use prisma, we should put this in a file that only runs the setup code once and shares the prisma object with our entire project. There are also some quirks when using prisma with next in development, so we can follow prisma's Best practice for instantiating PrismaClient with Next.js
/server/db/client.js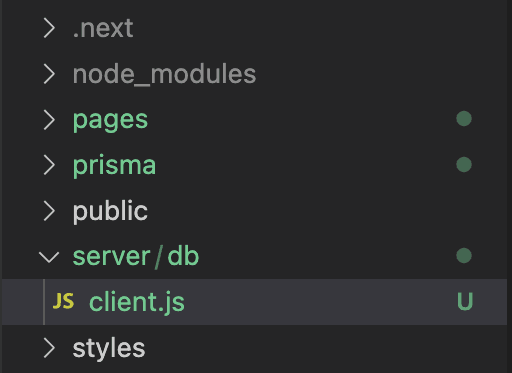
import { PrismaClient } from '@prisma/client'

export const prisma =
  global.prisma ||
  new PrismaClient({
    log: ['query'],
  })

if (process.env.NODE_ENV !== 'production') global.prisma = prisma
/pages/api/posts file, instead of creating the client, import the
prisma client from /server/db/client:import { prisma } from "../../server/db/client"
Everything should still work the same, but now we're using the same prisma client everywhere. Now let's fetch some data.
Fetching Data
We could make an API route that allows us to fetch all the posts. But this is a next app, so let's use the getServerSideProps function to fetch the posts on the server and do some server-side rendering.
/pages/index.js with the following code:// pages/index.js
import { prisma } from '../server/db/client'
export default function Home({posts}) => {
return (
<div>
<h1>Home</h1>
{posts.map((post) => (
<div key={post.id}>
<h2>{post.title}</h2>
<p>{post.content}</p>
</div>
))}
</div>
)
}
export async function getServerSideProps() {
const posts = await prisma.post.findMany()
return {
props: {
posts
}
}
}
We are using the prisma client to get all of the posts from the database and passing them to the Home component as props. But if you run the app right now yarn dev and visit the home page http://localhost:3000, you'll see an error:
Error: Error serializing .posts[0].createdAt returned from
getServerSideProps in "/". Reason: object ("[object Date]") cannot be
serialized as JSON. Please only return JSON serializable data types.
This is because prisma Dates are converted to JavaScript Dates, but we can't pass a date object as a prop from getServerSideProps. First, we need to convert it to a string. This can be handled in a bunch of different ways, but here's a simple way.
getServerSideProps:return {
props: {
posts: JSON.parse(JSON.stringify(posts)),
},
}
stringify converts everything to valid json data, so things like date objects get converted to strings. Then we parse the posts back to an object but the date object will remain a string. It's kind of weird, but it works and lets us get back to building the app, so 🤷♀️
If you visit http://localhost:3000 again, you should see the posts from the database.
Creating Posts
Now that we can fetch posts, let's add the ability to create posts from the home page.
title and content:import { useState } from 'react'
...
export default function Home({posts}) {
const [title, setTitle] = useState('')
const [content, setContent] = useState('')
const handleSubmit = async (e) => {
e.preventDefault()
console.log({title, content})
}
return (
<div>
<h1>Home</h1>
<form onSubmit={handleSubmit} style={{display: "flex", flexDirection: "column", maxWidth: "400px"}}>
<input type="text" value={title} onChange={(e) => setTitle(e.target.value)} />
<textarea value={content} onChange={(e) => setContent(e.target.value)} />
<button type="submit">Submit</button>
</form>
...
You can use fetch to send the data to the API route we created earlier, but I prefer axios.
yarn add axios
import axios from 'axios'
...
const handleSubmit = async (e) => {
e.preventDefault()
const res = await axios.post('/api/posts', { title, content })
console.log(res.data)
}
Now when you submit the form, you should see the new post in the console. You can also check the past is created using Prisma Studio.
But when a new post is created, the home page doesn't update. We need to refresh to see the new post appear on the page. Let's fix this using useState.
const [posts, setPosts] = useState(props.posts)
// Add a use effect in case the posts change when routing to the home page
useEffect(() => {
setPosts(props.posts)
}, [props.posts])
const handleSubmit = async (e) => {
e.preventDefault()
const res = await axios.post('/api/posts', { title, content })
setPosts([...posts, res.data])
}
Make sure you import useEffect for this to work. Try submitting a new post again and you should see it appear on the page without having to refresh.
Where to go from here
This is a pretty basic app, but it's a good starting point for next and prisma. Go build an app now and refer to the prisma docs when you're unsure about how to do something. Here are some useful links:
Code
https://github.com/Sam-Meech-Ward/code_snippets_prisma_next_demo.git
schema.prisma
// This is your Prisma schema file,
// learn more about it in the docs: https://pris.ly/d/prisma-schema
generator client {
provider = "prisma-client-js"
}
datasource db {
provider = "postgresql"
url = env("DATABASE_URL")
}
model Post {
id Int @id @default(autoincrement())
title String
code String @db.Text
language String
totalLikes Int @default(0)
totalComments Int @default(0)
createdAt DateTime @default(now())
updatedAt DateTime @updatedAt
}
server/db/client.js
import { PrismaClient } from "@prisma/client"
export const prisma = global.prisma || new PrismaClient()
if (process.env.NODE_ENV !== "production") global.prisma = prisma
pages/api/posts.js
import { prisma } from "../../server/db/client"
function titleFromCode(code) {
return code.trim().split("\n")[0].replace("// ", "")
}
export default async function handler(req, res) {
const { method } = req
switch (method) {
case "POST":
const { language, code } = req.body
const title = titleFromCode(code)
const post = await prisma.post.create({
data: {
title,
language,
code,
},
})
res.status(201).json(post)
break
default:
res.setHeader("Allow", ["POST"])
res.status(405).end(`Method ${method} Not Allowed`)
}
}
pages/index.js
import { prisma } from "../server/db/client"
import PostSmall from "../components/PostSmall"
import Button from "../components/Button"
export default function Home({ posts }) {
return (
<>
<div className="pt-8 pb-10 lg:pt-12 lg:pb-14 mx-auto max-w-7xl px-2">
<div className="max-w-2xl mx-auto">
<ul className="mt-8">
{posts?.map((post) => (
<li key={post.id}>
<PostSmall post={post} />
</li>
))}
</ul>
</div>
</div>
</>
)
}
export async function getServerSideProps() {
// will always run on the server
// newest first
const posts = await prisma.post.findMany({
orderBy: {
createdAt: "desc",
},
})
return {
  props: {
    posts: JSON.parse(JSON.stringify(posts)),
  },
}
}